Friday, 24 December 2010

196,000 Miles

Handling issues are developing, as always. I have been of the impression that all my handling problems have been related to the front end bushes. But a new noise has drawn my attention to the rear end of the car.

I am getting a very audible 'clunk' from the rear end every time torque is applied. i.e. every time I abruptly (although it is now getting easier to invoke it) de-clutch or engage the clutch or even just apply power the back end clunks.

After discussing it with a friend and reading up on it a bit, I seem to have very classic symptoms of worn rear subframe bushes.

Here is an extract from the very useful E34.net site describing my problems exactly:

Rear clunk noise when you disengage the clutch on an upshift / down shift; especially an upshift. when accelerating; the subframe is pulled away from the chassis via the wheel torque. when you push the clutch in, the subframe unloads and hits the chassis creating the thunk.
The rear of the car feeling like it steers itself. Probably best to do the rear pitman arms first before the subframe bushings if you have a self steering rear. or, at least have them inspected. If the pitman arms are good then this means the bushings are soft. No real way to inspect the bushings visually. however, if you support the subframe, you can easily remove the arm covering the bushing and see how torn it is.

The clunk is VERY apparent and also, the feeling of the rear end of the car self-steering! Yes, exactly! This now over the last few weeks seems to have really deteriorated and it clunks badly all the time.

But for ages I have had the sensation of the rear of the car seeming to steer itself. Many times I have rocked the back of the car wondering if something was wrong at the back. Also, when driving straight, say 50mph, if I wiggle the car left and right, rapidly to make it wobble, once I stop wiggling the steering wheel, the back end of the car seems to squirm around by itself for a second or two longer!
Definitely need to change them bushes!

Will make up a simple extraction tool to pull the old bushes out see how much of a difference it makes. I still need to replace the front rear control arms for quality Lemforder parts and am also going to upgrade the bushes to 750i bushes.

Wednesday, 1 December 2010

194,000 Miles

At the moment, pressing problems are the belt tensioner (have bought a new one) and the heater blower is having issues.

The tensioner keep periodically flicking into that opposite past TDC position removing all tension from the belt. Luckily I can just push the tensioner back into position with a long screwdriver without removing anything, so can fix it on the move. Just need some time to swap the tensioner for the new one. New one only about 32GBP.

The heater blower has progressively become less and less effective. The blower needs to be turned right up to max to get any sort of flow out the vents. In the current cold weather, it is very difficult to actually get the car interior hot.

It struggles to keep the windscreen demisted with all the flow directed to the windscreen and on max fan setting!

Bit of research and I think the best and most likely place to investigate first is the pollen filter. Hopefully it has one fitted and it is clogged up. Replacing this will hopefully let the heater system breath easily again.

Again, just need some time to pull it out. Looks tricky but found a few good guides to follow.

Sunday, 21 November 2010

193,000 Miles

The belt just went slack again. I thought maybe the tensioner bracket bolt repair had failed or something but I would have been surprised as a helicoiled aluminium bracket is much stronger than just a thread in parent metal.

On closer inspection it just seems as the tensioner spring had passed over top dead centre again but nothing broken. So I levered the tensioner bracket back towards its correct position and it popped back into position easily. Too easily if anything so I think the spring is getting tired.

I'll get a replacement spring.

Wednesday, 13 October 2010

188,684 Miles

Had a bit of a problem with ancillary belt drive the other day (2010-10-01). I started the car to go home and there was a bit of a rattling, clunky noise coming from the engine sounding like something was loose. On closer inspection, the ancillary belt was flapping around quite a lot. I stopped the engine and had a closer look and there was an awful lot of slack in the belt. Just as well I decided to have a look as it wasn't driving the pulleys properly and I was about to go on the motorway. This belt drives the alternator, power steering pump and water pump (which in turn is connected to the radiator fan via a viscous coupling). So I would have either ran the battery flat, over heated the engine or most likely both.

At first it looked like I had completely lost a tensioner or idler wheel. There appeared to be a blank boss which looked like it was where a belt should be. But after some research (see image of belt run below) it was apparent that this was just the centre pivot of an 'L' bracket (1 in diagram), which is used to pivot the tensioner pulley into the belt lower down.


Feeling lower down to where the pulley should be, I immediately found the bolt that holds the pulley to the bracket was hanging out! I could just grab it with my finger and pull it out. The threads on the end of the bolt were full of aluminium and so it had obviously stripped the hole it was screwed into. This hole is in the 'L' bracket.

Initial reaction was that I was going to have to replace the bracket, which I REALLY did not want to do as it would obviously be a BMW only part being a small casting. This would of course equal 3 figure amounts of GBP.

So to determine what was going to be required I stripped out the bracket to inspect it closer. This was easily done, with the exception of requiring a 17mm hex key, which is pretty big and not normally in most tool kits. Luckily, where I work, I was able to find one. This was required to slacken the large boss in the centre of the 'L' bracket.

Brief procedure for removing 'L' bracket:
  1. Remove radiator cowling - 2 plastic pop rivets at top.
  2. Remove front section of engine top cover - three cap head bolts.
  3. *Remove tensioner pulley bolt (already out on mine).
  4. With tensioner pulley bolt out the pulley itself will be free to come out.
  5. At this stage make a good note of the belt run. I managed to keep the belt in place. See image.
  6. Remove bolts at either end of tensioner spring and remove spring (both ends required as bracket + spring wouldn't come out past pipe work).
  7. Remove large central pivot bush with 17mm hex key (once slackened, easy to remove by hand).
  8. Remove 'L' bracket.
*Removing the tensioner pulley bolt if in tact would require the tension being removed form the belt first. In order to do this, I used a long bar (crow bar) to lever the 'L' bracket upwards to remove tension from the belt. Note that I did not have to do this at first as the pulley bolt was out and the wheel displaced so there was no tension. This is required if one wants to remove the belt (or 'L' bracket in this case) as the belt passes through a fork in the bracket.

Once the bits were out it was indeed obvious that the problem was that the bolt had stripped the thread out of the bracket. Its hardly surprising as there is only about 1.5D of thread depth which is not a lot at all for aluminium. Even though it is not under any axial loading, like I said it needs to be removed every time the ancillary belt is replaced, so it is easy to imagine when the belt has been replaced in the past that someone has probably just done the bolt up too tight.

The pulley itself and everything else all seemed to be perfectly in tact. One thing that was worth noting was that the 'L' bracket, when in situ, had managed to pivot itself past its top dead centre with the spring so that it was fully pivoting the wrong way. this must have been as a result of snatching the loose belt and this is why there was so much play in the belt.

So now all that I had to do was repair the stripped hole in the 'L' bracket, which was a straight forward Heli-Coil operation. This was the first time I had used a Heli-Coil myself and I was very impressed at how easy it was and how simple yet effective it is. It saved throwing the 'L' bracket away just because of one damaged hole.

The upshot of this simple fix was also NO COST, as if I had taken it to a garage I would have been charged several hours of labour time and no doubt their solution would have been to tell me that the 'fa-lan-gee' was broken and just gone to BMW and ordered a new 'L' bracket, which I dread to think how much it would cost as its definitely a BMW only part, which = license to print money! Either that or they would tell me that's what was needed, charge me accordingly, then just Heli-Coil it anyway.

Either way I reckon I saved a minimum 300 GBP.

Refit was, as very often, reversal of removal... and the engine started and has been running fine since.

Sunday, 22 August 2010

184,704 Miles

Still handling crap, suspect big bushes on control arms as they are the cheap ones. But could still be something else.

Oil and filter change.

Thursday, 29 April 2010

174,255 Miles

Passed MOT with no failures!

Just a few cautions about cracked high rear brake light, and some worn gaiters on control arms (bloody things), but not enough to fail. So pleased with that.

Wednesday, 14 April 2010

More Handling Issues

The car is currently handling quite poorly again. I have a lot of play in the steering and it feels, unfortunately, like the control arm bushes at the front are wearing out again.

Control arms - I think I have now learnt that the cheapest option is not always the best option. I have read people saying that you should use OEM quality parts for the control arms else you will end up changing them much sooner than expected. This seems to be the case as I have fitted the low cost option twice now since the new year (only four months ago!) and am in need of replacements already.

So I am going to change them and use OEM Lemforder parts this time, which cost a bit more but will hopefully sort this problem out.

Steering play - since having it back from the garage with new control arms (related or not I am unsure) the steering has become progressively worse. I now have about +/- 10 degrees of free movement before anything makes contact and starts moving. This is far from ideal, especially on the motorway where the car is free to wander in the limits of the free play, resulting in much correction with becomes tiresome and dangerous.

These cars have a steering box, as opposed to a more usual steering rack, which contains a recirculating ball mechanism. There is an adjustment screw handily provided on top of the box, suggesting adjustment is not unusual at some point in its life.

Thanks to a little guidance from BMW E34 Net I was able to adjust the box tonight, finally.

The job was very straightforward; you just locate the adjustment screw, which is quite obvious on top of the box as a threaded stud with a hex hole in it (for a Hex Key) and a locking nut around it. You undo the locking nut to release the stud, then with a hex key (Allen key) turn the stud to adjust the box.

In my case, I turned it one full turn in (clockwise), against the advice on E34 Net, as mine seemed very loose. Nipped the lock nut back off and drove round the block. The steering was much tighter! Very delightful, but perhaps a bit too tight, as it did not self centre. I had to put it back in the centre by pushing it.

So I just turned the adjustment stud back 1/4 of a turn, tried again, still a bit tight, another 1/4 turn back, stil a little tight, another 1/8 and perfect.

The steering now feels much better. The proper test will be driving on the motorway tomorrow. Hoping it will be like a normal car again, albeit with worn bushes, so I am not expecting it to be perfect.

But if it is a lot better, i.e. no steering play, then with new OEM bushes it should be back to the 'ultimate driving machine'!

Sunday, 14 March 2010

170,260 Miles

Changed the rear pads. Easiest job I have done on the car so far.

Make sure you chock the front wheels as this is obviously a rear wheel drive car and therefore nothing will lock the front wheels as simply as putting it in gear, like on a front wheel drive car.

Wheel off, two bolts on the back of the caliper off and the caliper comes off.

Remove the old pads. I tend to clean the area up a bit, where parts mate, i.e. where the pads sit in the caliper carrier; I just clean it up with a wire brush to remove accumulated crud.

Push the piston back into the caliper to make room for the new thickness of the new pads. This was actually as easy as pushing it in. Usually you have to wind the rear pistons in, applying pressure and turning it, but these just pushed in; nice.

I also like to pull the caliper sliding pins out to ensure they are clean and free moving. I clean them up and apply some fresh grease and put them back in the carrier and ensure they are lovely and slippy :)

Insert new pads, re-attach wiring to sensors and put the caliper back in place. Re-insert the bolts, refit the wheel, job done!

Wednesday, 3 March 2010

168,570 Miles

Just the day I went on paternity leave, we were luckily just getting home when the car started making a very funny noise and I could feel it too. It was an awful rumbling noise accompanied by vibration from the engine being felt through the steering wheel. Not nice. I had grim thought when listening to it at first thinking, oh no maybe the crank bearings have gone, as it sounds like a horrible, low down, internal knocking noise.

As I had just started paternity leave I luckily didn't need to go to work, so the next day I limped to the garage and asked someone to have a quick look. The very helpful people at TS Motors, Watford, had a quick look and spotted the obvious that the water pump had gone. The symptom being the rad fan, which is mounted to the pump on the front of the engine via a viscous coupling, was wobbling all over the place.

I was quite surprised, but also relieved, but the thought that the water pump had gone didn't cross my mind initially as the system had not lost any water. Usually, if the bearing fail in the pump, it tends to dump all its water in one go and you over heat. So I was surprised this had not happened. Anyway, looking at it, it was obvious as the fan was just flopping about, I knew the part wouldn't be too expensive, just a labour intensive job, i.e. lots of labour charge.

I would ordinarily do a job like this myself at home, but seeing as we had just had a new baby, it was not really convenient, so I booked it in to the garage to have the work done.

Whilst in the garage, I wanted them to do a few other jobs, seeing as it would be on the ramps. I needed to change the glow plugs, as the engine was becoming very reluctant to start, cranking for 30 seconds plus easily to get started. The cold winter had finally taken its toll and killed them off. The poor starting was becoming a major problem, especially when leaving for work at 0630 when all is quiet and then there's me cranking for a minute!

Also, unfortunately, I suspected the lower front control arm bushes had gone again. I could easily shove the front of the wheel inwards and see the bush flexing far too much. The car had not been handling brilliantly even after changing all the control arms only 2 months earlier. I think it is down to one of two things: Either I fitted them incorrectly or the components were inferior/faulty.

The only way I could think I fitted them wrong was if they were super sensitive to being tightened up with the arms in the correct orientation. You are supposed to tighten the bolt through the bushes with the arms positioned as if the car is at rest on its wheels on the ground, so that in most situation, the bush is not twisted, only temporarily with movement away from the rest position of the suspension. I tightened mine up with the hub jacked up, not literally with the wheels on the ground, so I could only think the angle was not quite right, but I find it very difficult to believe this would cause the bush to fail within two months.

The other idea is inferior or faulty components. I doubt they were faulty. Its possible but very unlikely really. So perhaps inferior. These were the cheapest option arms I could find, only 20 GBP each. I am sure I had read somewhere someone saying that you should really use OEM parts, like Lemforder, other wise cheaper alternatives will just fail quickly and end up costing you more in the long run. I will let the garage choose whatever arms they like and see how it goes.

So all in all, water pump, glow plugs and lower front control arms replaced, in a day's work. Wasn't too costly either, although 90% of it was labour, as usual, which makes me a bit sick knowing I could do it for free. But it was convenient to be free for a day instead of tied up outside with the car.


Got the car back and it starts on the dot, even when cold (very nice!), obviously no more noise from the water pump and handling seems.... better, still not perfect but better. Still things to investigate in that area I think.

Also on my to do list....

  • Tailgate gas struts all needed replacing.
  • Air/con not working
  • Heater still giving me hot air only


Side note... fitted some new interior lights as the ones I had were very basic, as in no map reading lights and no switches at all on the rear ones for someone to turn it on in the back to read. So I got some new ones from someone breaking a 535i which had individual map spot lights and switches in all four positions.

Saturday, 30 January 2010

167,000 Miles

Oil and filter change. Never seen so much oil come out of a car... but then I am used to cars that use their oil. This car dumped what looked like its full 6.75l of oil, hopefully indicating that it doesn't use/loose any oil. I hadn't changed it since I bought it (bad, I know) and who knows how many miles before I had it it had been changed, so it had done at least 15,000 on the last oil without loosing any.

I do try to change oil at a maximum of every 10,000 miles.

Noticed turbo heat shield has come away. It just a bent piece of steel covered with mesh type type... looks like it just fatigued at one of the bends. Will make up a new piece out of some stainless or something.

Also have bought new anti-roll bar drop links, as the current ones are bad, making a noise as they are very worn and I think now effecting handling again... going around bends that make the car want to roll, it suddenly tries to snatch into the corner. So changing these will be interesting to see if it is them causing this. If not then I'll be damned as I have changed every joint and bush at the front end now.

Monday, 18 January 2010

BMW Log - Front End Sorted-ish

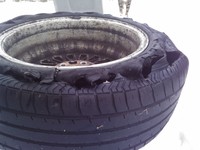
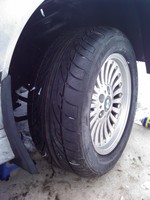
Well I was right, the tyres were badly out of alignment and scrubbing badly... so badly the front two tyres wore almost completely smooth in 5 days (~500 miles)! So not only a puncture to replace but now the front two tyres so it had to be new tyres all round. Now I am glad I had already replaced the wheels so I could at least buy normally priced/sized tyres. Still not what I wanted to be doing right now. The tyres were shocking... I was shocked!

  Bald Tyre 1 Bald Tyre 2 Blown Tyre 1 Blown Tyre 2

 So (in the snow) I changed the tie rods, just in case they were not good before going for 4-wheel alignment. As always, should have been a simple job, just wheel off, undo two nuts holding ball joints on either end of tie rod and pop the joints out. But of course things never go smoothly on cars; the inner joints were impossibly seized. The nuts came off fine, but trying to separate the joints out the knuckles proved hard. Once again I broke another ball joint separator tool (the scissors type) so went and armed myself with a couple of alternatives, the fork type (which you hammer between the joint to 'wedge' it out) and a claw type with a bolt to screw onto the joint stud. Access was awkward and I ended up using the fork wedge type to free them but it took about half an hour of constant hammering with a lump hammer and plenty of heat from the blow torch. Advise here is to cut and remove the rubber boot if you are trying to use the fork wedge separator type tool so that the tool is acting metal on metal. The rubber will cushion the blows from the hammer and not work. After an hour or so both sides had been replaced with new tie rods.

  Tie Rods Tie Rod End

 Next morning I go to Blackboots for my 4-wheel alignments (thru lots of snow!). When I get there, they get it up on the excellent Hawker Laser alignment system and show that everything except for toe is OK. Also, they tell me there is no other adjustment on this car! Therefore 4-wheel alignment is not possible. this just strengthens my hatred/mistrust of large 'fast-fit' organisations! So a bit of a waste of time. Well they aligned the toe but there was no need for the fancy laser alignment as all. So when 'fast-fit' told me the car needed 4-wheel alignment, they were either trying to rip me off or didn't know what they were talking about. Both alternatives are not good. I wonder if the guy was there that day they would have done the 4-wheel alignment (obviously realising they couldn't adjust anything except toe) and charge me for it!?! Still anyway, drives a LOT better now. There is still knocking from the front but this is now just the anti-roll bar drop links, which are an 'easy' quick fix and cheap and will not put the car out of alignment again, so they can be saved for a rainy day (preferably not raining). Also it still feels a little vague, like there is play in the steering mechanism but this is to be expected on an old car and I have read ways of taking up this slack, so I might look into that one day.

 New tyre:

  New Tyre

Wednesday, 6 January 2010

BMW Log - Aftermath of changing Control Arms on the BMW

Well after changing the control arms on the BMW to sort out worn bushes, as ever, I have inevitably introduced new problems. To be expected really... any suspension component work is always likely to throw the wheel alignment out on a car, I just didn't realise how sensitive BMWs are to badly aligned wheels.

Don't know if it is a rear wheel drive thing or just BMWs setup, but it drove absolutely terrible after changing the arms... literally felt like I had octagonal wheels, which were trying to pull me strongly left and right... any which way but straight. I made a b-line for a garage to get some tracking done... on sunday, my only option was that really 'quick' place, which I would never usually use for different reasons, but this was an emergency.

I found out that BMWs need 4-wheel alignment and that the guy capable of doing it wasn't in that day. Kind of fortunate in a way as I intended doing more work on the car (tie rods) so didn't want to spend all the money on 4-wheel alignment only to take it apart again soon.

So I asked them just to do 2-wheel alignment, just to get it drivable. It did make a difference and I could use the car, but either it is still mis-aligned, or the tie rod ball joints are bad as it is still handling like I am driving through SEVERE side winds on ice, pulling left and right all the time.

I am probably scrubbing tyres badly and am trying to make it through one week until I can change the tie rods and get 4-wheel alignment. I am booked into Blackboots in Chesham for 4-wheel alignment and have heard good things about these guys, so am looking forward to getting it all sorted and having a car that is a pleasure to drive again.

Oh and just to rub salt in the wounds... on my way to work today I got a poxy puncture!!

Got onto the motorway, car making a very odd noise... left it for a bit thinking it was just to do with bad tracking, but go to the point where driving was very difficult and noisy and just wrong. Pulled onto hard shoulder and found nearside rear tyre shredded and hanging off!! F*cker!!

This was also on the morning when we had snow... so there I am 7am, hard shoulder of the M1 changing a poxy wheel in the snow... not happy...

So not only am I skint from all the control arm work...I now have to buy new tyres... minimum I want to buy a pair... can't afford 4 all at once. How joyous life is at the mo.

Happy new year.

Monday, 4 January 2010

BMW Log - Control Arms